If your a northern gardener, starting seeds indoors is a must. This is especially true if you are wanting to grow warm weather crops, like our favourite tomatoes.
Starting in the backyard greenhouse is not always a good option, as preparing the greenhouse after a long winter is a big job. The last thing we want is to contaminate seedling trays. Starting seeds indoors can be a big boost to your greenhouse and garden.
To which I earn a small commission, at zero cost to you!
Find more info in our Privacy Policy.
Transplant often do better than seed sown directly into the ground. For the greenhouse, the movement of seed and seedling inside a small backyard greenhouse can create hygiene issues that can create more work when transitioning to production mode.
Of course, if your are a Greenhouse Fanatic and have a 25 ft greenhouse, this is not a gonna be a problem for you, likely you have space! Starting seeds at home is a great way to get the whole family involved and provides an opportunity to better understand the needs of your plants.
Germinating seeds is a skill in itself, also there are more opportunities to grow more varieties of plants. Transplants found at your local garden center or big box store just don’t have as many varieties. It’s also super fun!
11 Steps to Help You Plant Seeds with Success
1. Label your Seedlings and Keep Detailed Records
We like to keep a spreadsheet that includes the date planted, and the variety planted. Added to this the date when seedlings appear and some other general information.
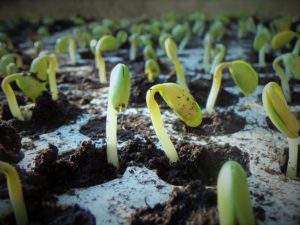
Garden plants look amazingly similar when they are just tiny seedlings.
Seedlings must be marked! For us, all planting containers are all labelled with a reusable craft stick.
2. Select the Best Seed Starting Mix
The potting soil mix should be light and hold enough water to keep seedlings moist.
Can you start seeds indoors using garden soil?
This is not recommended. Soil from the garden doesn’t drain well. Also, organic matter in the soil will rot your seeds this combined with the potential for seedling fungal issues.
Buy products that have been treated to kill most pathogens and most seeds. Disease or weed seeds from your garden may also be introduced.
I wouldn’t recommend it. Plain soil doesn’t drain well enough, and seeds will tend to rot or the seedlings will be more likely to get fungal problems. You might also introduce weed seeds or diseases that are in your garden.
Some common mixtures (mix one third each)
- soil or compost
- sand, vermiculite or perlite
- Coir (fibre from the outer husk of the coconut)
Buy products that have been treated to kill most pathogens and most seeds.
Homemade Sterile Soil
If you’re concerned with soil disease, sterilize your soil or compost by heating it to 100°C (212°F) in the oven for 30 minutes. Be careful though excessive soil heating can increase the chance of soil toxicity, heat with caution.
My current favourite potting soil is Triumph Plant Coco Coir Bricks. It is a great lightweight well-draining grow medium.
3. Choose the Right Seed Starting Containers
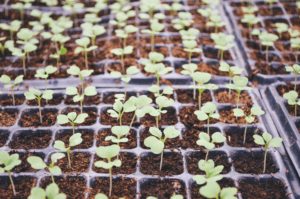
We start our seeds in old cell-packs and reusable small pots. I generally like to save small pots from store-bought quick herb packs. Asking friends to save pots for you as part of there recycle is another great option.
My reused pot have varying degrees of contamination so it is important that pots are sanitized before reuse. We like these old pots for there lightweight but sturdy construction, they drain well and often fit in large seedling trays.
Some homemade pot well go intentioned are flimsy, and too small (ie. eggshells, newspaper)
We see recommendations for Peat Pots quite often mostly because they break down in the soil, in our experience, this is not the case and stunt young plants. We find ourselves having to peel back the pots to free the roots.
A great project for gardening with kids is creating pots from old yogurt containers.
Avoid containers with potential toxins, such as old computer cases. In general reuse containers designed to hold foods such as yogurt, cheese, and butter. Use those old container lids under your seedling pots to catch the drips.
Potting up plants such as tomatoes indoors is a good option for developing a good root ball for planting larger transplants outside. So have some pots for that. We like to go from 1-inch cells to 3-inch pots for indoor potting up.
4. Plant Seeds at the Right Depth
Seed packets ‘should’ give specific instructions, but if you have seed germination problems, this is a great general rule.
Rule of ‘green’ thumb for planting: Plant seeds roughly to a depth three times the diameter of the seed.
Some seeds need some light to germinate, so they should be planted on the surface or only very lightly covered.
5. Provide Plenty of Light
Seeds don’t need much light for germination if any. Be sure your seedlings get adequate light.
Plants need to sleep, be sure to turn off the lights at night so they can rest. Indoor seedlings require about 16 to 18 hours of sunlight each day.
We use a simple timer to turn our grow lights on and off each day. Without enough light, indoor seedlings will stretch towards the available light. This makes them tall and flimsy.
6. Keep Indoor Seeds and Seedlings The Right Temperature
To achieve germination (seed sprouting), warmth can help start the process. For germination (getting the seeds to sprout), a little warmth helps jump-start the process. I have placed seed trays in the basement stacked on top of each other, on top of the refrigerator, and near the heater. (lights just aren’t needed till the seedlings emerge)
Seed starting mats are convenient as your seed trays won’t have to move around the house. Keep those trays out of reach of the kids and pets.
Once seedlings have emerged at around 15-21°C (60-70°F). Temperature matters, too hot or too cold can stunt seedling growth. It could even kill your seedlings.
For some seeds stratification (chilling before planting) may be required, especially tree seeds. Have a look at our Best Germination Techniques for Sakura (Cherry Blossom) Seeds for details on seed stratification.
7. Cover Indoor Seed Trays to Improve Seed Germination
Stacking your trays on top of each other during germination can be a great space saver. Covering seedlings with a cover during germination will trap moisture and improve germination rates.
Our use of reused cell-packs for indoor seed starting is a result of them fit well into planting trays, with the option of clear plastic dome covers.
Because I reuse commercial cell packs for indoor seed starting, they fit neatly into planting trays with matching plastic dome covers.
When your seedlings emerge, removal of the cover is necessary to allow for air circulation. Watch out for mould, on a daily basis, while you wait for them to sprout. If you see any signs of mould remove the cover for a few hours to allow moisture to escape.
8. Provide Enough Water to Seedlings, Not Too Much Though
The indoor seed starting mix you use should be moist enough to squeeze in your hands and hold together. If water runs out when you squeeze your soil it is to wet. Trays should remain moist after first watering for the duration of germination when your trays are covered.
After seedlings have emerged, water lightly every few days. Soil should never be soggy and should dry a bit between waterings. Seedlings with to much water will show signs such as moss or fungal growth. Also, seedlings that tip over dead with a rotten base are another sign of to much water.
9. Harden off Seedlings before Transplanting to the Garden
You will lose some plants during the hardening off process. Seedlings grown indoors need time to adjust before going into the garden outside. Create a protected area for your seedlings outside of direct sunlight. Have a seedling schedule of a couple of hours a day outside, increasing the time each day.
Within about five days you should be ready to transfer them to the garden.
10. Feed and Care for Young Plants
We like to use foliar feeds like liquid seaweed fertilizer in a soluble powder to provide nutrients to the seedlings just add water. Other great gentle feeding options include compost tea. Often we use a beneficial bacteria solution on the soil as well.
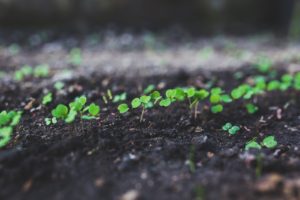
Transition crowded seedlings to large pots or transfer them to the garden. Also if crowding is an issue it may be time to cut them back leaving the healthiest. Just snip the least healthy to ground level.
Always review water, light and temperature level to ensure your plants thrive.
11. Provide Good Air Circulation and Movement
Here at Greenhouse Fanatics, we are very aware of the large fan used in commercial greenhouses, and you may have noticed them too.
Air movement provided by these fans keep foliage dry and prevent fungal diseases. Also, strengthen the plant stems, because the seedlings must hold themselves upright in a breeze.
With the fan on the same timer as the lights, you will have an efficient high-quality setup.
do contain affiliate links that we earn a small commission for,
they come at no extra cost to you!

